Experimenting With Low Cost 3D Printing

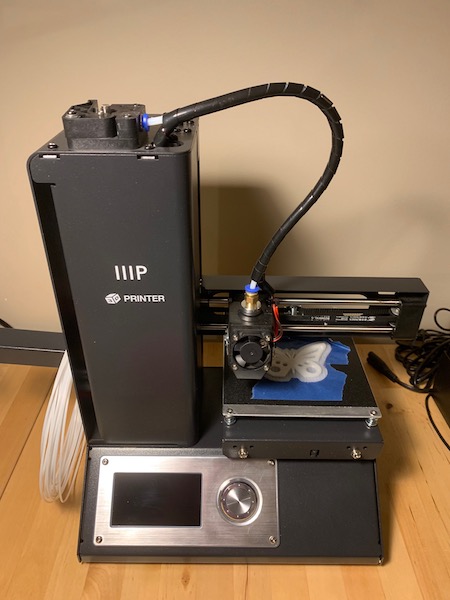
As I've been learning electronics and robotics I started to see some use cases for 3D printing parts. Watching some other makers such as James Bruton push the limits of 3D printing inspired me to give it a try. James is currently building a walking dog (think Boston Dynamics) out of 3D printed parts. Knowing starting out could be expensive I kept an eye out for sales. Last month I checked Monoprice for any black Friday deals. There I discovered the Monoprice Select Mini V2 (Refurbished) for $99. It's a small 3D printer but the reviews seemed generally positive. Unable to resist the ability to 3D print for under $100 I bought it.
Testing The 3D Printer
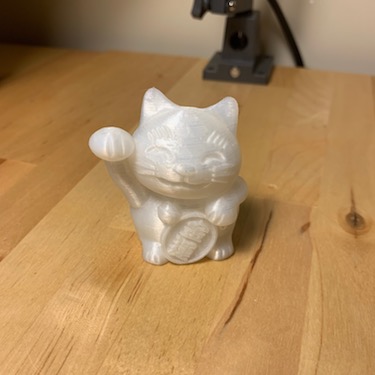
The printer arrived two weeks earlier than estimated which was an excellent surprise. It came with a test print on the print bed. I'm not sure if this is standard for Monoprice or if it was part of their testing for refurbished models. Either way it was nice to see it everything was working when they shipped it. Setup was simple and involved only a quick calibration to ensure the print bed was level. The printer came with a micro SD card which when inserted had one file cat.gcode. After putting in the sample of filament the printer comes with I selected cat.gcode and hit print. I didn't know what to expect but as you can see below it successfully printed a cat!

Downloading 3D Models And Printing
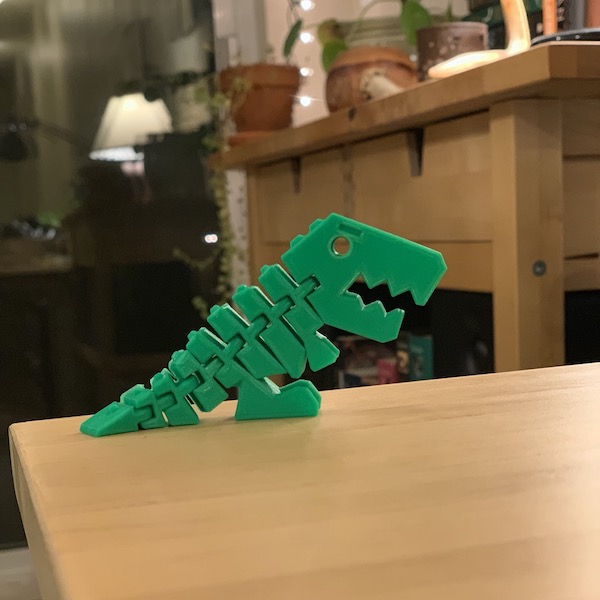
One of my first 3D printing experiences was working in a co-working space alongside a 3D printing company, Print to Peer. At the time they'd printed me a model of a fish with articulated joints. The concept of printing hinges in one piece was amazing to me. When browsing Thingiverse for a 3D model to try printing I came across a design for a flexible dinosaur. This reminded me of the fish model so I had to give printing hinges a try myself. Ready to start I ordered some filament on Amazon. Monoprice also has filament but their shipping rates aren't great for Canadians.
Printing only took a few steps. I downloaded the 3D model from Thingiverse, opened it in Cura and exported a .gcode file. Thingiverse is a website where you can browse and download 3D models. It has a great variety from practical parts to artwork and toys. Cura is an application that takes your model and prepares it for printing. This is also where you can adjust all the settings for the quality of the print. While I'm sure there is a lot you can do with Cura at this stage I only uploaded my file and used the default settings.
The only stumbling block I came across was the micro SD card that came with the printer. It wasn't working with my SD card reader. When I looked into this I discovered that strangely the printer only supports micro SD cards. Most modern SD cards are actually SDHC which doesn't seem to be compatible. I wasn't able to find another micro SD so I tried another card reader which ended up working. With the new file loaded I hit print and ended up with this:

The printer does have USB capabilities so at some point I will likely hook it up to a Raspberry Pi. This should bypass any potential issues with micro SD cards. It looks like software such as Octoprint also allows you to control prints from your phone or laptop. You can also connect a webcam to monitor your printer. There are a lot of people modifying and upgrading the Select Mini V2 as well. I've found lot's of videos, advice and parts on YouTube, Reddit and Thingiverse.
Results After The First Few Tests
There are still lots of things to test but so far I'm incredibly happy with how well this 3D printer works. The quality seems equivalent to many $500-$1000 printers I've seen over the past few years. As long as you aren't looking to print anything large it's a great place to start. For me the next steps will be to dive into some 3D modelling software so I can design my own parts.
Here's a list of what I used to get started:
- Monoprice Select Mini V2 (This one is new but keep an eye out for refurbished)
- 1.75mm PLA 3D Printer Filament
- Thingiverse 3D Model
- Cura
If you have any comments or questions reach out on twitter!